Idli/Dosa Pancake Experiments – South Indian Cuisine

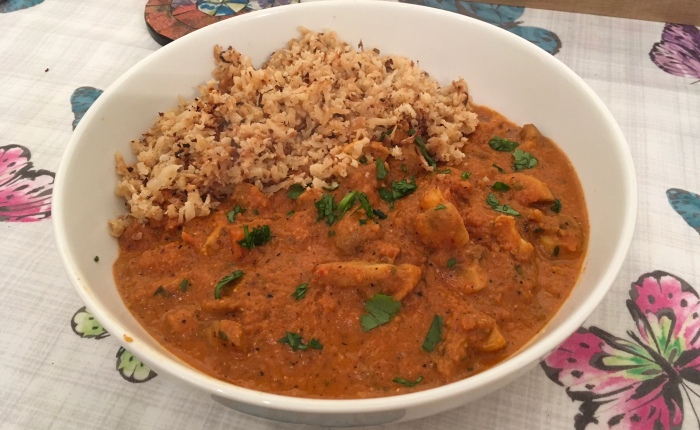
My work colleague is from South India. I was telling him about my pancake creations and he said that I should try some Indian pancakes. We got chatting about them and the different ingredients and it sounded like good fun. These aren’t protein pancakes by any shape or form. Although they have lentils in they are mostly carb with a tiny bit of protein. However, you can definitely enjoy them with a chicken curry or Tandoori Chicken Tikka to up the protein count.

img_4402
Idli with coconut chutney
As this was all totally new to me I researched a lot of recipes.Idli are like little steamed buns and Dosa are larger pancakes like crepes. My colleague confirmed that I could use the same “batter” for my Idli and Dosas so I set to work. Making it was quite fun and reminded me of when someone gave me a sour dough mix called “Herman” for me to grow, use, and pass on. You first rinse and soak the rice and lentils. Next you blend the rice and dal (separately) with water, mix them together, and then leave them in a warm place to ferment and rise.

img_4570
Soaking the urid dal (left) and rice (right) separately

img_4572
After leaving to ferment, little air bubbles will be visible in the mixture
The quantity of rice to urid dal is quite easy to get the hang of. It’s 1 part lentils to 4 parts rice so 1 cup rice + 1/4 cup urid dal or 100g rice to 25g Urid Dal. Recipes on the web are quite mixed about which rice to use. My first attempt was with basmati rice. The Idli were nice, but the Dosa batter just wasn’t right. I couldn’t get the pancake to expand to the edge of the pan. My colleague suggested using some really cheap supermarked value/essential/economy rice. The cheapest possible, e.g. Tesco Everyday Essentials long grain rice for 45p a bag rather than basmati. I then tried two different mixes the next time around: For one of them the rice part was 1/2 cup cheap long grain + 1/2 cup parboiled rice (the pouches of rice that you can microwave for 2 mins and serve). The other mix was 1 cup cheap long grain rice.

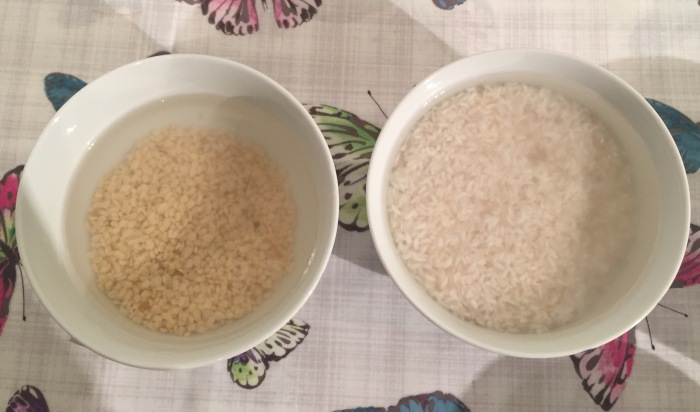
The mix with the parboiled rice resulted in wetter idli and less crispy, thicker dosa. This wasn’t what I wanted. The mix with just the cheap long grain made nice, dense idli and thin and crispy dosa so I decided that that was the mix I was sticking with.

img_4417
Masala dosa (stuffed dosa)

img_4665
Plain idli and stuffed idli (Same stuffing as the dosa above)
I managed to get my dosa to stretch to the edge of the pan too so it was perfect! So here is my final recipe…

Idli/Dosa Batter

Ingredients:
1 cup uncooked cheap long grain rice (+ 1 cup cold water)
¼ cup Urad dal (1 cup cold water)
¼ tsp Fenugreek seeds
Salt (to taste)

Method to make the batter:

1. Rinse rice in a bowl and Fenugreek seeds + Urid Dal in another bowl. Rinse really well with lots of water changes and rub the grains together.
2. Soak the rice in 1 cup of water. Soak Urad Dal + Fenugreek seeds in 1 cup of water in separate bowls with cold water for 4 hours
3. Drain both but save the water in individual bowls.
4. Blend the Dal with ¼ cup of its reserved water. Blend until smooth and gradually add more water. You need 3 x water to Dal (so ¼ cup dal needs ¾ cup water). You should end up with a really smooth paste.
5. Transfer into a big bowl.
6. Add rice to blender adding water as needed (approx ¼ cup total – you don’t add much water to the rice). Blend (pulse) until slightly coarse. The rice shouldn’t be as smooth as the dal. If you feel it with your fingertips you should feel little grains.
7. Add rice to same bowl as dal with some salt and mix well.
8. Cover with tea towel and place in warm spot (the airing cupboard where our water heater stands is where I put mine) for 8-10 hours.
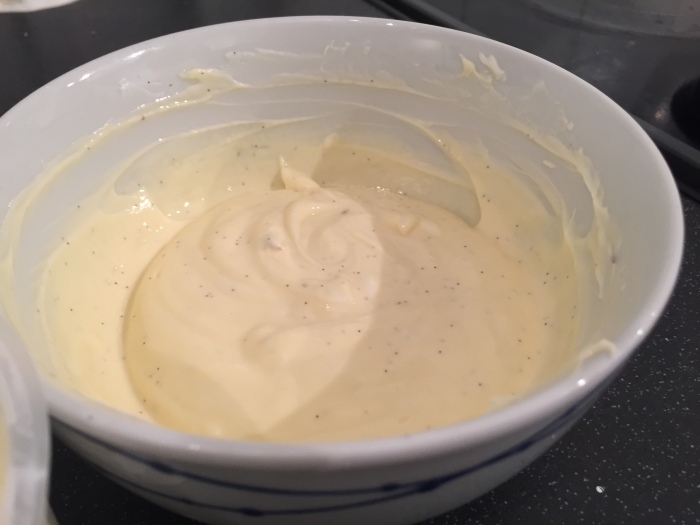
9. After it’s been left to ferment, stir the fermented batter and you should see little air bubbles. Your batter is ready!

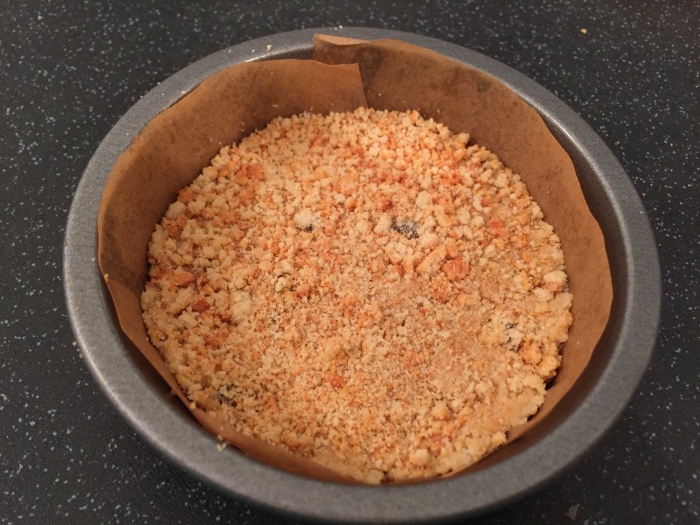
Method to make Idli:

To make Idli, you can use an egg poacher pan like this one (you can get special idli steamers, but my egg poacher pan does the same thing).

  1. Fill the pan with water as if you’re poaching eggs and allow to boil.
  2. Spray the 4 cups with oil and put around 2 tablespoons of batter in each cup, they won’t reach the top like eggs do.
  3. Put the lid on and leave to steam for 4-5 minutes. They are done when the top of the Idli is firm.
  4. Wet a spoon and use it to scoop the Idli from the cups. Serve dipped in coconut chutney, mango chutney is very nice with them too. This is a nice recipe for coocnut chutney. I add a little granualted sweetener as well to mine though.

Method to make stuffed Idli:

  1. Repeat the normal Idli method, but instead of putting 2 tablespoons of batter in the cups, add one tablespoon and steam for a minute or so to ensure it’s a bit solid.
  2. Add the filling (e.g. potato-based saag aloo, curry, chutney, etc.) then add another tablespoon of batter to the top.
  3. Replace the lid and continue to steam for another 4-5 minutes

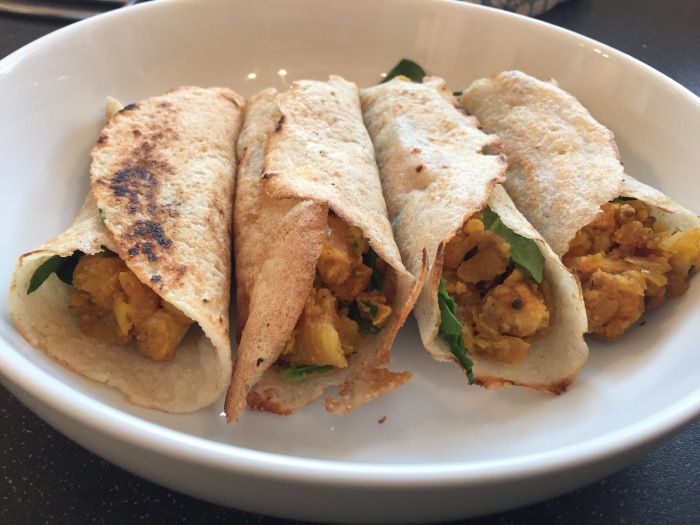
Method to make dosa:

  1. Add a little water to your batter mix. Not too much, just enough for it to pour into the pan and coat the bottom.
  2. Heat a non-stick frying pan on a low heat with a few sprays of oil.
  3. Take a big ladle of the batter and add to the pan. Move the pan around to reach the sides and use the base of your spoon to help spread the batter to the edges. If you don’t have enough batter in the pan, add a little more any bits that are missing and it’ll fuse together. Cook for a few minutes on that side before flipping and cooking the other side.
  4. You can then either fill the pancake with a mix or cut it into quarters and dip in a chutney. For mine, I make a filling using potato, chicken, onion and spices. You could also add spinach, peas or any other veggies that you like. It’s quite a dry mix, rather than a saucy curry or dal. I follow this recipe, but add chicken and extra veg.

Carrot cake Protein Pancakes

Carrot cake is one of my favourites. I love the spices and delicious frosting so it made sense to see if I could create a pancake version. I was surprised at how delicious it turned out, just like a big slab of carrot cake.

img_4541
It’s also macro friendly at under 400 calories with really high protein. You could lower the carbs a bit too by adding a few less raisins and a little less carrot.

Carrot cake protein pancakes

Serves: 2 people

Ingredients:
The pancakes
My usual pancake recipe
200g grated carrot (use about 180g and reserve the rest as topping)
Sweetener
40g raisins
12g chopped walnut pieces
2 tsp pumpkin pie spice (or 1/2 tsp ground cinnamon, 1/2 tsp ground ginger, 1/2 tsp ground cloves, a sprinkle of nutmeg, a little sweetener is the spice mix is a bit bitter)

The frosting
Version 1 (a wet frosting) : 120g Philadelphia (I used “lightest”) + 60ml unsweetened almond milk + 1 tsp grated orange rind + sweetener to taste
Version 2 (a firm frosting): 60g Philadelphia + 6 heaped tsp Greek yogurt + 1 tsp grated orange rind + sweetener to taste.

The topping
2 whole walnuts
20g grated carrot + sweetener
Sunflower Seeds, pumpkin seeds, apple pieces, chia seeds, chopped nuts etc. Anything you want, or nothing at all! I added some Chia Charge honey trail mix and a sprinkle of bee pollen.

Method:
1. Add the grated carrot to a frying pan on a very low heat. Add the raisins, walnuts, sweetener and half the spices. Fry for a few minutes to soften and let the lovely flavours sink in. Take off the heat and leave to cool.

img_4448

2. Make the pancake mix as usual. A cinnamon flavour protein powder will go well, if you don’t have this then vanilla will work. Add the rest of the spices to the pancake mix.

3. After blending the mix, transfer it to a bowl then add the cooled carrot mixture and stir well.

img_4449

4. Fry the pancakes as usual. Use a spoon to scoop the mix into the pan to ensure you get a good balance of mix and carrot in each pancake.

img_4450

5. Allow the pancakes to cool completely. I made mine the day before and transferred them to the fridge until the next day. As long as they are cool enough to stop the frosting melting then they will be fine.

6. Make the frosting. Version 1 will 1 will give you a runnier frosting and version 2 a firmer one. Just mix all the ingredients together with a hand whisk.

7. Layer the pancakes with about 1 tsp of the frosting in between each one and then some on top.

8. Finish your stack with the topping of your choice.

9. Devour and enjoy with a cup of tea!

Macros: 367kcal, 38C, 33P, 10F (per serving)

Raisin and cinnamon custard pancake pudding

img_4171

This is such an awesome dessert that I feel that it should have it’s own recipe. I also feel like it deserves an exciting name! I call it “Protein Pancake Pudding” but that doesn’t really tell you much. “Raisin and cinnamon custard pancake pudding” is a little more exciting so we will go with that!

It’s basically my pancake recipe made into silver dollar (very small) pancakes, layered in an ovenproof dish, covered in flavored yogurt and raisins, then baked in the oven. It is DELICIOUS and I’ve made it 5 times now because we love it so much. It’s just like bread and butter pudding, but with a healthy twist. So here’s the recipe…

Raisin and cinnamon custard pancake pudding

Serves: 2 people

Ingredients:
A batch of my pancakes (Follow the recipe here and use Cinnamon flavored protein powder. MyProtein’s Cinnamon Danish is delicious. Otherwise, vanilla flavor with 1/2 tbsp cinnamon would work)
1 pot of Muller Light yogurt Banana and Custard flavor
1 egg, beaten
1tsp Cinnamon
50g raisins (You could swap for blueberries, chopped dried apricots, whatever you like)
50ml unsweetened almond milk
A few squirts of fry light

Method:
1. Make the pancakes by following the usual recipe.
2. In a bowl add 1 pot Muller light, the egg, cinnamon and almond milk.
3. Layer the pancakes in your oven proof dish and work out how the layers will work (i.e. depends on the size of your dish and how many you’re going to get in each layer).
4. Add the bottom layer of pancakes, spoon over some of the yogurt mix (I usually add 1 tbsp yogurt per pancake so if your bottom layer has 2 pancakes, add two spoons of yogurt mix), sprinkle with a few raisins.
5. Repeat this for all layers. Depending on the size of your dish you’ll end up with 2-4 layers. Hopefully you’ve got a bit of extra yogurt left to add some more to the top, and a few extra raisins too. Add a few squirts of Fry Light to the tops.
6. Bake in the oven at 160C (fan) for 15-20 mins.
7. Serve warm with a big scoop of ice cream on top. Heaven!

Macros: 298kcal, 29.7P, 30.1C, 5.4F (Per serving, without ice cream)

Save

Snickerdoodle Baked Oats

Take your oats to the next level by popping them in the oven for about 20 minutes. You could make whatever flavour you want, but peanut butter and chocolate is always a winner…

IMG_4195

You’ll need a small casserole dish/ramekin like one of these to bake it in. No need to put the lid on though.

Ingredients
30g oats
1/2 a banana, mashed
2 Tbsp powdered peanut butter (I use PB2)
75ml unsweetened Almond milk
1 Tbsp sugar free chocolate syrup (I use Hershey’s as its awesome)
1 egg white
Sweetener to taste

Method
1. Mix well in a bowl and then add it all together in your mini casserole dish. I like to leave mine to soak overnight, but if your short on time just bung it in the oven for 20 mins at 160C (fan).

IMG_4186
2. The mix should rise, but not overflow.

IMG_4194
3. Top with a chopped up protein bar, Snickers protein works best of course! Drizzle with a little Hershey’s sugar free syrup and zero calories Caramel sauce

IMG_4195

Macros: 240kcal, 41C, 12P, 4F (without the topping)

Save

Protein Pancakes Recipe

Recently I’ve been pretty obsessed with protein pancakes. Why? Well, I worked out something about myself. I worked out that if I had something sweet, awesome and tasty to look forward to at the end of the day then I could get through the day without cheating, losing track, or being tempted by “Do you want one?” biscuit/cake/donut/sweet offers from work colleagues!

Protein bars didn’t cut it. They were nice, but they’re a snack not a dessert. Proats were OK, but I started having them for breakfast instead. So cue protein pancakes! They’re definitely not a snack, they’re a meal! Protein pancakes FTW!!!!!! I even added myself an extra 4th meal for each day of “Dessert” in MyFitnessPal. It does of course mean that other meals/snacks are cut slightly lower in calories so that the pancakes fit my macros, but it is so worth it. Depriving yourself of things you love, demonising foods or only eating things that are considered “a healthy option” sets you up for binge eating which is why I am such a fan of IIFYM. Saying that, my pancakes could probably be considered to be a “healthy option” however, you can get really naughty with the toppings and enjoy yourself.

Pancakes are great, because I can add my base recipe to my food diary for the day (along with the compulsory dollop of low cal ice cream) and then get creative with the toppings depending on the macros I have left in the evening or the ingredients I have available. Lots of variety and lots of fun creating them.

So my experiments began and I tried lots of different recipes with the main aim of something low cal, high protein, not too high on the carbs. However, I didn’t want it to taste like a pile of flavourless rubber AND didn’t want it to look like a sea creature in the pan (i.e. it needed to hold a circular shape when poured in). As you can see, this early attempt wasn’t very circular…

img_4047-1
An early pancake creation… interesting… lol!

My mix does work best when done in a pancake pan with individual holes or in little circular/shaped pancake moulds, but if you omit the Almond milk it should hold it’s shape in a normal frying pan. The key to making this recipe work is adding a lid to your pan so that the tops steam as the bottoms cook. The pancakes will slowly rise due to the bicarb/baking powder in them, but as they rise the tops will steam. You can then flip them without the batter spilling everywhere. You should get a nice golden pancake like this…

IMG_3855
My awesome pancake pan

EDIT 26-03-17: I tried swapping the egg whites for egg white powder. Doing this seems to create a more solid pancake which doesn’t deflate when taken off of the heat. I think it’s a tiny bit too solid, but half and half does seem to work really well. Each egg white is about 10g egg white powder + 30ml warm water. Feel free to experiment and see what combination you like best.

Cass’ Protein Pancakes (Serves 2)

Ingredients
4 egg whites (or 40g egg white powder + 120ml warm water, or 20g egg white powder + 60ml warm water)
40g whey protein powder (whatever flavour you like)
1/2 banana
1/4 tsp bicarbonate of soda
1/2 tsp baking powder
50-100ml unsweetened Almond milk

Method
1. Spray the pan with a few squirts of fry light and heat it on a low to medium heat for a good few minutes.

2. Pour the mixture into the pan and pop the lid on. Watch the pancakes rise and once the top is steamed/set it’s ready to flip. It’ll take 1-2 mins.

3. Cook the other side for a minute or two before removing and cooking the rest of the mixture.

4. Get inventive with some delicious toppings and enjoy!

Macros: 134 calories, 21.6P, 7.8C, 1.2F (per serving)

The mix can be turned into waffles too. Just fill a 4 waffle silicone tray with the mix and bake for 10 mins on 180C. You could also cool the pancakes and add Greek yogurt or quark in between for a Protein tiramisu. Layer them with custard or flavoured yogurt + an egg + raisins then bake in the oven for 20 mins at 160C for a pancake variation of bread pudding.

Save

High Protein Trifle Recipe

High Protein Trifle Recipe

For a few days I had the idea of creating a high protein Trifle. I’d picked up a pack of Hartley’s sugar free jelly which was only 9kcal a portion. It tasted nice so the idea of Trifle was floating around my head. Most evenings I make a protein mug cake for dessert. It’s quick, slightly sickly, and the macros are good. I figured that if I chopped up a mug cake, that could be the sponge. I had some frozen summer fruits in the freezer so they would do for the fruit.


I was a bit usure about the custard. I could have used low fat Ambrosia, but remembered I had a stash of a Muscle Mousse banana flavour in the cupboard. If I didn’t have muscle mousse I would have tried mixing banana/vanilla whey protein with water and gelatine powder as that will set like the mousse does. MyProtein make a very nice ‘Apple crumble and Custard’ flavour whey which would have well suited the Trifle as an alternative.

Then finally: The topping. I absolutely love Quark. It tastes just like a thick Greek yogurt, but is classed as a soft cheese. You can find it in most supermarkets in the UK, but if you can’t get hold of it, Total 0% would work or some Light Spray cream would do the job, but make sure you put spray cream on top right before you serve it or it won’t look very impressive!

This Trifle is probably my favourite sweet protein experiment to date. Even better than my baked cheesecakes! The macros are awesome and it tastes just like your usual Trifle. It did take quite a lot of time (mostly waiting for things to set) but it was oh so worth it and probably no more work than your usual Trifle. I loved it, but as an extra test I gave one to my other half. He doesn’t eat for macros or high protein food and he said it tasted lovely and just like a normal Trifle. So I’m calling that a big success! My only criticism is that I think it’d be best to half the recipe and just make 2 at a time as they will probably only keep for a couple of days… or I suppose you could eat them all at once, lol!


Cass’ High Protein Trifle

Serves: 4
Macros per serving: 157kcal, 27P, 9C, 2F

Ingredients:
The Base
Pack of Hartleys sugar-free strawberry jelly (to make 1 pint)
Tin of Fruit cocktail, frozen summer fruits, etc. (I used 50g frozen summer fruits, but feel free to use as much or little fruit as you like)
1 egg white
25g vanilla or birthday cake whey protein powder
30ml unsweetened almond milk (or other milk)
1/2 tsp baking powder

The “custard”
75g banana muscle mousse
150ml Unsweetened Almond milk (or other milk, or just water)
75ml water

The Topping
250g Quark
2-3tsp granulated sweetener
Seeds from 1/2 a vanilla pod
1/2 tsp vanilla extract
Cake sprinkles

Method
The Base
1. Make the sponge for the base by creating a Protein mug cake: In a mug mix 25g whey, baking powder, almond milk and egg white. Whisk to mix well. Microwave at 500W for 2-3 minutes. Keep an eye on it and stop the microwave when you see the cake reach the top of the mug. I usually do my mug cakes for 45 seconds at 800W, however, I wanted a slower bake so that the cake wasn’t too wet.
2. Leave the mug to cool and then turn the cake out. Chop the cake up into squares or strips and distribute them between the four containers.
3. Scatter the fruit on the base of the container.
4. Mix up the jelly according to the packet instructions to make 1 pint. Pour the jelly into the containers.
5. Pop the containers in the fridge and leave overnight for the jelly to set.

The “Custard”
1. Mix up the muscle mousse according to the packet instructions. The instructions say to use water, however, I always add some milk because I think it tastes better. So rather than using 225ml water to make up the 75g, I use 150ml almond milk and 75ml water.
2. Pour the custard on top of the set jelly.
3. Leave in the fridge to set for half an hour to an hour.

The topping
1. Once your custard has set, mix the quark with an electric whisk (or you could use a hand whisk) and add your sweetener, vanilla extract and vanilla pod seeds.
2. Divide the whisked quark amongst the trifles to create the topping. Use a spoon or small hand whisk to fluff the top of the trifles.
3. Go crazy with the cake sprinkles to finish! 🙂

Butter Chicken Recipe

Butter Chicken Recipe

The following recipe started as a recipe for Butter Chicken, but has evolved so that it can now also be adapted to create a Chicken Korma or Chicken Tikka Masala with just a few extra ingredients. The main difference is that coconut milk is added to the Korma and passata is added to the Tikka Masala whereas just extra water is added to the Butter chicken.

I’d encourage that the recipe is adapted and modified to suit taste. Add extra chili if you like it spicy, extra salt, sweetener, coconut milk, vegetables, etc. whatever you like. This recipe makes quite a mild curry so extra chili will be needed if you want to turn up the heat. All measures for tsp/tbsp are level and not heaped, but if you like extra of something then make it heaped. Be creative and make it yours. 🙂

The recipe is split in two where you make a curry base and then the rest of the curry. The curry base can be made ahead of time and stored in the fridge for 5 days or even frozen. It was adapted from the recipe book that came with a Tala Thali Cooks Measure that I purchased. Basically, I started to make the butter chicken according to the recipe, but didn’t “agree” with it so totally adapted it to create my own curry starter recipe.

Ingredients:
Curry base:
2 tbsp peanut oil
1 tbsp cumin seeds
1tbsp yellow mustard seeds
6 cloves garlic, crushed
3cm fresh ginger, grated
1 large white onion, finely diced
2 tsp chilis, finely diced
1tsp Garam Masala
1tsp Tumeric
1 tsp salt
1 tsp smoked paprika

If making a Korma:
+1 tsp ground corriander

If making a Tikka Masala:
+1 tsp ground corriander
+1 tsp mild or medium chilli powder

The Curry:
6 chopped salad tomatoes
100-150ml single cream (I use Elmlea cream substitute to reduce the calories)
Dash of lemon juice
Pinch of salt
600g chicken, chopped
400g mushrooms, quartered
Small handful of fresh, chopped coriander
2tbsp Tomato purée

Korma:
+ 50g creamed coconut dissolved in 200ml water
+ sprinkle (1tsp maybe) Canderel or 1tsp honey (for sweetness)

Tikka Masala:
+1tbsp Tomato purée (so, 3tbsp in total)
+300g Passata

Method:
Curry base:
1. Fry the cumin seeds, mustard seeds, garlic and ginger in the oil for a few mins, add a splash of water if they stick.
2. Add the onion and fry for 7-10 mins so that it softens. Again, add a splash of water.
3. Add the garam masala, tumeric, salt, chillis and paprika (Korma: + ground coriander; Tikka Masala: + ground corriander, chili powder). Fry for a few mins.
4. Use a hand blender and blend the mixture to turn it into a paste.

The Curry:
Use the curry base (ensure it’s heated first if you’ve taken it from the fridge/freezer) and add to it to make the Butter chicken curry…
1. Add half the tomatoes, cream, tomato purée, dash of lemon juice and pinch of salt with a good splash of water (Korma: + coconut milk and sweetener; Tikka Masala: + Passata). Cook for about 5 mins to soften. Hand blend the mixture again and add a bit more water to make more into a thick sauce.
2. Add the chicken, mushrooms, 3/4 of the coriander and the rest of the tomatoes.
3. Check the consistency of the sauce and if you’d like a runnier curry add some hot water until you achieve the desired thickness.
4. Bring to the boil then leave to simmer uncovered for 15-20 mins so that the chicken is cooked through and absorbs all of the flavour.

Serve and garnish with the rest of the coriander.

High Protein (Unbaked) Cheesecake

Take One:

Following on from my Cheesecake success, I thought I would try my hand at creating a Banoffee version and a Chocolate Peanut Butter version. To get the flavors in, however, I’d have to add protein powder. My first attempt at this was shocking. I made the cheesecakes just as I had the previous two, popped them in the oven and then removed them to find two Yorkshire-pudding-esque creations. “Why did I put them in the oven?” I thought to myself. The addition of the protein powder really didn’t work with a baked cheesecake. I topped them and tried them both. The flavors were OK, but the textures were all wrong. They were very chewy and dry.

Take Two:


With my head properly screwed on I recreated the cheesecake abominations the way I should have done in the first place. As they weren’t being baked, I needed something the ensure the quark would set so that the cheesecakes could be removed from their moulds. I swapped the 1/2 egg (for the baked ones) for 2g powdered gelatin mixed with a little water (as per packet instructions) and mixed this with the Quark and 15g protein powder (MyProtein Banoffee and MyProtein Chocolate Brownie although standard Banana or Chocolate would do as an alternative. Also, you could skip the gelatin and use Banana and Chocolate Muscle Mousse). You could also add 1tbsp PB2 to the Chocolate powder to give it more of a peanutty taste.

I mixed everything up, this time using MuscleFood Chocolate + Hazelnut flavored biscuits for the base rather than the Forest Fruit ones, and left it overnight to set in the fridge. I was very pleased when the cheesecakes were easily removed from their moulds and didn’t lose their shape. I topped the banoffee one with a few slices of fresh banana, a pecan nut and some shavings of high protein chocolate. The Chocolate PB one was topped with about 1tbsp PB2 mixed with water, some crushed peanuts and high protein chocolate shavings.

img_3415

The Baked berry high protein cheesecake from my previous experiment is definitely the winner in taste followed by the peanut butter, then banoffee and finally the tropical one. However, all of them were great high protein treats and great successes!


High Protein (Unbaked) Cheesecake

Ingredients:
Base
2x MF High Protein Biscuits (Or other biscuits, but the macros will be different)
1tsp semi-skimmed milk (or Almond milk, Coconut milk, etc.)
5 sprays Groovy Food Coconut oil
Filling
100g Quark
2g powdered gelatin mixed with hot water (as per packet instructions)
15g Protein Powder (flavor of choice)

Method:
1. Preheat the oven to 160C (fan assisted). Crush the biscuits with a rolling pin and add to the bowl with the milk and Coconut oil. Mix well, then add to the tin pressing down well. Pop in the oven for 5 minutes.
2. While the base is in the oven, mix the quark with the powdered gelatin/water and protein powder using a hand whisk.
3. When the biscuit base has been removed from the oven, add the quark mixture on top and level out.
4. Place in the fridge overnight or for 6-8 hours.
5. Remove from the tin when chilled and add your topping of choice.

Macros:
(Not counting the topping)
Calories: 211kcal
Protein: 30g
Carbs: 11g
Fat: 6g

Save

High Protein Baked Cheesecake

So, I had the bright idea to try and create a high protein cheesecake (err… preesecake?). Cheesecake isn’t something I’ve made very often (Once, I think?), however, it looked simple enough to create a higher protein version. To get the protein content high, I thought the best thing to use was Quark as a substitute for the cream cheese. I noticed that many recipes online that used quark combined it with soft cheese or Greek yogurt, but I thought I’d have a go with just quark.

I’m lucky enough to have a good supply of Musclefood High Protein Biscuits in the Forest Fruits and Chocolate & Hazelnut varieties which seem to have been discontinued (Per biscuit: 36 kcal, 2.2P, 2.8C, 1.7F). If you can’t get hold of these then I guess some light Digestives, Rich Tea biscuits, protein cookies or even protein crunchies (cereal) could be used as a substitute. Some more inspiration came from a Tasty video that I caught on Facebook claiming to  be a recipe for a healthier raspberry cheesecake. In the video they used milk to bind the biscuit crumb base rather than butter.

So, the first step is to get your base sorted. Whilst you’re doing this, pop the oven on at 160C (that’s for a fan, set at 180C for non-fan assisted). I used a small, round tin about 10cm in diameter. To make cheesecake removal a bit easier, I cut some greaseproof paper to cover it. I first cut a long strip about twice the height of the tin. I folded it in half and then snipped along one half. I squirted the tin with 3 squirts of oil to help the paper stick to it then lined the strip around the sides of the tin with the snipped flaps along the bottom. Next I drew around the base of the tin and cut out a circle. This was placed on the bottom of the tin, on top of the cut flaps.

To make the base, I used 2 MF Forest Fruit biscuits. I bashed them with a rolling pin in a bag, added them to a bowl, poured in about 1tsp of milk and 5 squirts of Groovy Food Coconut Oil. Don’t overdo it with the milk, you only need a tiny splash. Adding too much will make the base too sticky and you won’t be able to cover the tin. Once finished, add the crumbs to the tin on top of the greaseproof paper. To crisp the base up I popped it in the oven for 5 minutes whilst getting the filling prepared.

img_3361
Ready for the oven

I made two slightly different cheesecakes to start with so split my quark up into two bowls of 100g. In another bowl I beat an egg and added half to each. You’ll need to whisk the egg and quark mixture quite well. It’ll look like it’s curdling to start with, but keep at it and it’ll become quite smooth.

img_3363
The quark filling with some vanilla pod seeds

Now you can add whatever you like to the filling. I added about 1/6 of a vanilla pod to each one (scrape the seeds off). Then I added a few drops of white chocolate and vanilla MyProtein flavdrops to one. I added a small scoop of MyProtein Tropical Storm powdered flavoring to the other. Just do this to taste: add a bit, stir it up, taste.

img_3362
The biscuit bases after 5 mins in the oven

Once you’re happy with the flavor, spoon the quark on top of your biscuit base and level it out to make it as flat as you can. Bake in the centre of the oven for 15 mins.

img_3367
Baked!

Let them cool down then place in the fridge overnight. If making in the morning, I guess 6-8 hours would do. You want them to be set so that when you remove them, they come out whole.

fullsizerender
Removed from the tin

The final step is the decoration. I added some cranberry jam to the top of my vanilla one with a few frozen blackcurrants and white chocolate stars. To the Tropical cheesecake I sprinkled a few broken Pineapple fruit crisps, dessicated coconut and a clemantine segment. Keeping with the Christmas time theme!

img_3389-copy
Ready for eating!


They were absolutely amazing and tasted almost identical to your usual cheesecake. The one slightly noticeable difference is that the base isn’t as crunchy and buttery, it’s slightly more moist. Leaving out the butter, however, does keep the calorie count a lot lower.

So, here’s the recipe for one basic Cheesecake for a tin 10cm in diameter. which can be adapted with different flavorings and toppings depending on what you’ve got in your cupboard, or what you fancy…


High Protein Baked Cheesecake

Ingredients:
Base
2x MF High Protein Biscuits (Or other biscuits, but the macros will be different)
1tsp semi-skimmed milk (or Almond milk, Coconut milk, etc.)
5 sprays Groovy Food Coconut oil
Filling
100g Quark
1/6 vanilla pod seeds
1/2 whole egg
Some kind of sweetener, flavoring of choice, etc.
Some kind of topping of choice

Method:
1. Preheat the oven to 160C (fan assisted). Crush the biscuits with a rolling pin and add to the bowl with the milk and Coconut oil. Mix well, then add to the tin pressing down well. Pop in the oven for 5 minutes.
2. While the base is in the oven, mix the quark with the egg and vanilla pod seeds using a hand whisk. Add any flavors or sweeteners and mix these in well too.
3. When the biscuit base has been removed from the oven, add the quark mixture on top and level out.
4. Bake for 15 mins, leave to cool and then place in the fridge overnight or for 6-8 hours.
5. Remove from the tin when chilled and add your topping of choice.

Macros:
(Not counting the topping)
Calories: 185kcal
Protein: 20.1g
Carbs: 10.4g
Fat: 7g

Save

Save

Rice hack to lower calories

It looks like this is old news, but I’ve only just found out about it.

Apparently you can lower the calories of rice by 60% by cooking it in the following process:

Simmer for 40mins with 1tsp coconut oil.
Cool in the fridge for 12 hours.

This causes the body to absorb less calories from the rice due to this cooking process causing around half of the rice to be indigestible causing it to just pass through the body. Without this process, the starchy carb will be broken down in the small intestine and turned to glucose then possibly stored as fat (if not used).

This news was reported in March 2015 by many sources (Daily Mail, Telegraph, BBC).

Some of the sources say that the rice will still have the same structure even if reheated, however, they warn about reheating rice that has been left at room temperature. The trick is to get it in that fridge as soon as possible!