My next creation is a Banoffee Chickpea cake. As I was using a banana, I left out the usual 100g of yogurt that I usually add. You’ll notice from my photo that the topping is quite runny. I mixed the protein powder with 60ml Almond milk and then realised I’d used too much. Therefore, in this recipe I recommend using less. You need just enough for the protein powder to dissolve so that the liquid is smooth before mixing with the Philadelphia.
The cake had a great banana and caramel flavour. It was spot on. If I made it again I probably wouldn’t change anything apart from using less Almond milk for the topping.
Serves: 8 slices
Ingredients: The Cake:
1 tin Chickpeas in water (240g drained weight)
4 Egg whites
1 very ripe banana
120ml water
60g Slender Chef Caramel syrup (Could use other sugar free syrups)
40g Egg white powder (I use MyProtein Egg White Powder)
20g Sukrin gold (or other sweetener)
25g Coconut flour
75g MyProtein Banana Flavour Whey
Pinch of salt
1.5 tsp baking powder
0.5 tsp Bicarbonate of soda
15ml lemon juice
Method: 1. Preheat the oven to 160C. 2. Blend all of the wet ingredients together and separately mix all dry ingredients together apart from the baking powder, bicarb and lemon juice.
3. Add the bicarb, baking powder and lemon juice and then add to the cake tin. Bake for 30 mins.
4. While baking, mix together the protein powder with the almond milk and FlavDrops then leave in the fridge to set.
5. When the cake is removed from the oven, slice in two and spread the layer of Prutella through the middle.
6. Top with the Philadelphia mix then dot the 8 banana chips evenly around the edge. Finally, sprinkle the crushed banana chips and chocolate sprinkles on top in the centre.
Another day, another chickpea protein cake experiment. 🙂 This time Gingerbread. As usual I had a Google around to see what other recipes suggested. Ground Cinnamon, Ground Ginger and Allspice seemed to be the spices. I had some Protein Dynamix Gingerbread flavour whey protein powder to hand as well so I thought this would be a nice addition. As this is quite a specific flavour, you could swap it with a Cinnamon flavour whey (MyProtein Cinnamon Danish is very tasty) or a vanilla flavour whey, but crank up the spices and other flavourings a little.
I noticed that treacle was often used so my swap for that is some Slender Chef Caramel syrup, however, you could probably use sugar free pancake syrup or a Jordan’s Skinny Syrup as a substitute there.
Next up was Stem Ginger. I found some Crystallised ginger and thought that would be a nicer addition all chopped up inside the cake. To help with the syrup part I grabbed some Ginger Preserve (jam) from Tesco and added 50g of that to the mix. If making again I’d probably omit the Ginger preserve from the cake and instead add 100g as the cake filling to make it extra sweet and delicious.
Ingredients for the cake
I made a lemon-flavour topping using light soft cheese, lemon rind and lemon juice then decorated with some dried fruits. Instead of a cheese topping you could use some more of the Ginger preserve or even Orange marmalade.
Ready for icing
Gingerbread Protein Cake Recipe
Serves: 8
Ingredients: The Cake:
1 tin Chickpeas in water (240g drained weight)
4 Egg whites
100g Fat free greek yogurt (or quark)
120ml water
1Tbsp lemon juice (Optional)
40g Slender Chef Caramel syrup (Could use other sugar free syrups like Jordans Gingerbread Skinny syrup)
40g Egg white powder (I use MyProtein Egg White Powder)
25g Coconut flour
75g Protein Dynamix Gingerbread flavour Whey (Could used a Cinnamon version + a little extra Ground Ginger)
1Tbsp baking powder
0.5 tsp Bicarbonate of soda
1tsp Ground Cinnamon
1tsp Ground ginger
1tsp Allspice
Pinch of salt
20g Sukrin gold (or other sweetener)
50g Crystallised Ginger, chopped + 50g Ginger Preserve (Or swap for stem ginger in syrup, chopped)
Topping:
150g Lightest cream cheese (I used Waitrose Lighter soft cheese)
1Tbsp lemon zest
1Tbsp lemon juice
25g Aldi “Fruity Fiesta Pocket” (Or other dried fruit)
Filling:
50g Ginger Preserve + a splash of boiling water
Method:
1. Preheat the oven to 160C (fan).
2. Blend the wet ingredients until smooth: Drained chickpeas, egg whites, yogurt, lemon juice, water, syrup, 50g ginger preserve.
3. Mix together the dry ingredients (apart from the Crystallised/stem ginger) in a bowl: egg white powder, whey, coconut flour, baking powder, bicarb soda, spices, salt, sweetener
4. Add the wet ingredients to the dry and then blend with a hand blender until smooth.
5. Add the chopped ginger and stir well to distribute around the cake.
6. Bake the cake for 25 mins.
7. While the cake is baking, mix the cream cheese, lemon zest and lemon juice for the topping and then place in the fridge to thicken. If you want a runnier topping you can always add a splash of Almond milk.
8. When cool, slice the cake in half. Mix 50g ginger preserve with a splash of boiled water and coat one of the insides of the cake halves.
9. Assemble the cake and top with the cream cheese mixture then decorate with some dried fruit or chopped ginger.
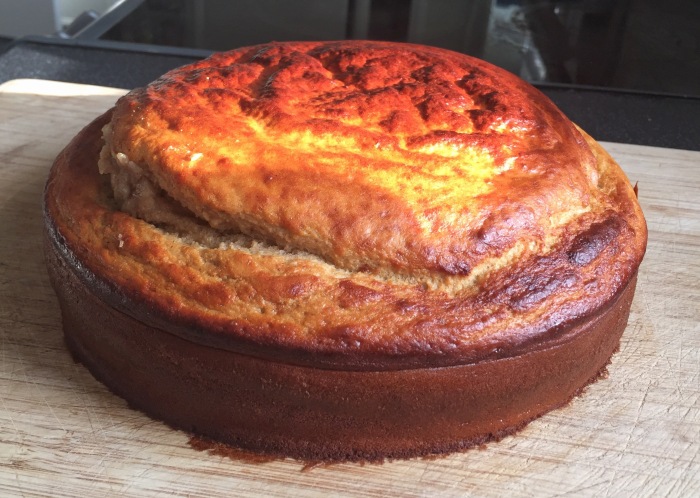
It was time for yet another variation on a Chickpea protein cake. This time I decided to try a Coffee and Walnut cake. Another success!
Cake Ingredients
The challenge with a coffee cake is always (in my opinion) getting enough coffee flavour into it. I used 120ml Espresso which was the equivalent to 2 shots, 1Tbsp Nescafe Azera (finely powdered coffee) and the whey had a coffee flavor to it. I tasted the mix and it was slightly coffee tasting, but I thought I’d added enough to get the taste into it. I was a little disappointed with the first slice I tried as I felt that the coffee flavor was a little lacking. It was nice, but needed a little more kick. I left the cake for a day in the fridge before trying the next slice and I was surprised that the coffee flavor had really intensified and it was much more obvious. I was very pleased. Even still, I would up it to 4 shots of Espresso next time I make the cake so my recipe below includes 4 shots rather than the 2 shots that I used. Basically just taste the mix and ensure that you’ve got enough coffee flavor in there. If not, you could always add some instant coffee dissolved in a little water, or some Camp coffee essence. It doesn’t matter what you use to get that flavor in, so you could use entirely instant coffee and vanilla whey. Just be aware that if let for a day the flavor will get a bit stronger.
Mixed and ready for the oven
This cake was a big success. The carrot cake is the winner and my favourite so far, but this was still delicious…
Perfectly risen and tested with a skewer
Chickpea Coffee and Walnut Protein Cake Recipe
Serves: 8 slices Ingredients: Cake:
1 Tin (240g drained weight) Chickpeas in water
75g Coffee flavour whey (I used Protein Dynamix Caramel Mocha)
40g egg white powder (I use MyProtein Egg White Powder)
4 Egg whites
120ml Espresso (4 shots), chilled
1Tbsp instant espresso powder (e.g. Nescafe Azera)
25g Coconut flour
100g Greek yogurt/Quark (I used Brooklea 0% from Aldi)
40g Chopped Walnuts
1Tbsp baking powder
1/2 tsp bicarbonate of soda
2Tbsp zero calorie caramel syrup [Optional]
20g Sukrin Gold [Optional]
Method:
1. Preheat the oven to 160C.
2. Combine the wet ingredients: Blend the chickpeas with half the Espresso until smooth. Add the Egg whites, caramel syrup and yogurt and blend to mix. Reserve the other half of the Espresso to rinse out the blender after you’ve added the contents to the cake mix.
3. Measure the dry ingredients (except the nuts) into a bowl: Add the whey, egg white powder, espresso powder, coconut flour, baking powder, bicarb and Sukrin. Mix to combine.
4. Pour the contents of the blender into the bowl with the dry ingredients. Use the rest of the Espresso to rinse the blender and also pour into the bowl. Mix to combine.
5. With a hand blender, or electric whisk, mix the ingredients until smooth then add the chopped walnuts and stir to combine.
6. Add the cake mixture to a circular cake tin and then bake in the centre of the oven for 25 minutes.
7. While the cake is cooking prepare the topping by mixing the Philadelphia. Coffee Essence, Almond Milk and Canderel and whisking. Place in the fridge to thicken and set a little while the cake is in the oven.
7. Remove the cake and leave to cool. When fully cool, ice the top with the icing from the fridge and then decorate with the whole walnuts.
We got our first taste of a Five Guys burger last weekend and it was delicious. I was instangly on the case working out how to create my own version at home. Thankfully there is a lot of info online about exactly how Five Guys make their burgers so it was easy to do the research.
This was my final result:
My Fakeaway – Almost as good as the real thing
Step one was sourcing the ingredients. I wanted my version to be healthier, but as close to the real thing as possible.
The Bun:
I started with the bun. Five Guy’s bun is unusual in that it has egg as an ingredient, “If you notice something a little different about the buns at Five Guys than the ones at other burger chains, you’re right: They contain almost twice as many eggs as standard buns, and also leave out the chemicals and dough conditioners found in other buns. The only ingredients in the buns are flour, eggs, milk, sugar, water, salt, oil, yeast, and sesame seeds.” [Source]. Brioche buns contain egg, but they are sweet and go really soggy quickly in my experience. I was going to settle for a standard seeded soft roll, however, a bit of research found that Waitrose rich & buttery burger bun was a very close match. Unfortunately this meant 216kcal for the bun rather than about 154kcal. It was a good decision. Have you ever had a burger at Burger King, McDonalds or at home where the bun just falls apart as you eat it? This bun didn’t do that at all. It held its own and kept the burger together. Perfect!
Waitrose burger buns – As close to the Five Guys buns as I could find
The patties
Next was the burger. I decided on 2 patties. Five Guys pattys are about 3.3oz each [Source] (nearly 100g) so the 400g pack of MuscleFood Extra Lean beef mince that I had in my freezer would do the job nicely. This mince has the advantage that it is very finely ground and well compact, unlike the 5% fat beef mince that the Supermarkets sell. If I was using the Supermarket mince I would have used a food processor/hand blender to mince the meat to compact it a little first. Five Guys don’t season their meat, however, their meat is a lot more flavoursome and fatty than mine so I made a slight change and sprayed the meat with a few squirts of Turci smoked BBQ spray and a few squirts of Turci garlic spray. I wanted to add some salt and pepper as well, however, I followed the advice from Serious Eats and didn’t salt the meat until the patties were formed. I sprinkled a little table salt and ground white pepper on both sides.
I rolled the meat into 4 100g balls. For each one I placed a square of greaseproof paper on top of the ball and then smacked it with a pan to create an even patty. To cook the burgers, you “smash” them. This is a method where you use a heavy spatula to press down on the top of the burger for a couple of minutes. Contrary to some beliefs, this doesn’t push all of the juices out of the burger leaving them dry, but instead helps it evenly cook and brown. The burger will be nearly cooked all of the way through before you flip it to cook the second side.
One of the advantages to cooking this yourself is that you can get a rarer burger than they serve at Five Guys, if that’s what you like. Otherwise, just make sure you cook it for an extra minute each side.
After a few bites – Slightly rarer in the middle than you’d normally get from Five Guys itself
The Toppings
Five Guys use American Deli style cheese, which doesn’t seem to be readily available in the UK so I settled for cheap cheese singles from Aldi at 55kcal a slice. To improve the calories and macros of the recipe, Eat Lean Protein cheese would be a better option, however, doesn’t melt as well.
For the bacon I used 25g smoked pancetta per bun. I fried this in the pan before frying the patties so the patties got cooked in the bacon fat. I also fried some diced onions and sliced mushrooms in a little Fry Light.
Other ingredients are iceburg lettuce which I chopped into chunks, 2 slices of salad tomato, 5 slices of Gherkin, extra light mayo, ketchup and American mustard.
The Pan
Over all of the ingredients, I think the most important part of this recipe is the pan. A cast iron griddle pan is the way forward for burgers and frying pretty much anything. After recently buying one I’m a complete convert. My fried onions were perfect. I’ve never got them as tasty using a non-stick pan in all my years of cooking. The burgers were stunning too. Nicely browned on the outsides and juicy on the inside.
Cast iron griddle pan – Unbeatable for cooking burgers
Get on with the recipe then…
OK, that’s the introduction over. On to my fakeaway recipe
Five Guys Bacon Cheeseburger “All the way” Fakeaway Recipe
Serves: 1
Ingredients: The Burger:
1 Waitrose Rich and Buttery Burger bun (here) or any seeded burger bun
2 slices burger cheese or ~40g Eat Lean protein cheese
200g MuscleFood Extra Lean Beef Mince (Or any supermarket 5% fat beef mince, finely ground with a hand blender or food processor)
Table salt and finely ground pepper
“All the way”
5 round slices of Gherkin aka “pickles”
20g diced onions
50g sliced mushrooms
25g smoked pancetta
Ketchup
American Mustard
Extra light mayonnaise
Method:
1. Spray the mince with 5 squirts of Turci garlic spray and 10 squirts of Turci smoked BBQ spray. Mix with a fork to combine. Prepare the patties by making two 100g meatballs. Cut four squares of greaseproof paper slightly larger than the size that the patty will be. Place one at the bottom and one at the top of each meatball. Smack each meatball with the bottom of a flat pan holding it by the handle and then hitting it down. The patty should then be almost exactly the right size and evenly distributed. Place the pan on top, apply a little pressure and just wiggle the pan to stretch the patty out a little more. Repeat for the other patty. Sprinkle a little salt and pepper on either side of the patty.
2. Heat the cast iron pan on a medium heat. Fry the diced onions and mushrooms and set aside in another pan to keep warm when they are cooked.
3. Toast the top and bottom of the bun in the pan for a minute or so until it’s nicely crisp and brown. Remove from the heat and place on top of a sheet of tin foil so that you can dress the buns ready for the burgers.
4. On the bottom bun do 3 rings of ketchup and then 2 rings of American mustard. On the top bun squirt some mayo and spread it. Then add the iceburg, 5 slices of gherkin and 2 slices of tomato.
4. Fry the pancetta in the pan. This won’t take very long at all. Once cooked, place in the warm pan with the mushrooms and diced onion.
5. Place both patties in the pan and within 30 seconds of placing them, use two spatulas to press evenly on top of both patties to keep pressure on them. Leave to cook for about 2 minutes before you flip them. You don’t need to press down on them after flipping. Leave the burger to cook to your liking and then place one of the cheese slices on top. The second cheese slice is placed on top to make a star (The Star of Lakshmi to be precise! Lol). Pop the other patty on top of the cheese and leave to melt while you finish preparing the buns.
6. Add the onions on top of the bottom bun, followed by the mushrooms and finally the bacon.
7. Place the patties on the bottom bun on top of the bacon and then carefully place the top bun on the top patty by holding the tomato to keep the iceburg and gherkins in place.
8. Quickly fold the tin foil around the bun to kepe it warm while you add chips or other food to the plate. This should help the cheese melt to make the burger all oozy and delicious.
9. Serve and enjoy!
Macros for my fakeaway burger: 781kcal (60P, 44C, 40F) Macros for the Five Guys burger: 1100kcal (55P, 44C, 78F) – Over 2000kcal if you have their fries with it though! Lol!
Topped with spring onions and Chives and served with a grilled Joseph pitta bread
I love slow cooked beef and when I saw the photo of a Texan Chili in The Food Lab book, I instantly wanted to create it. I wasn’t totally happy with the recipe though so thought I’d make some modifications. The recipe in the book is pretty much meat, an onion, chilis and spices. That was a bit limited and I wanted to bulk it out a bit so fused it with the usual chili I make and added sliced mixed peppers, chopped tomatoes and kidney beans along with a few spice changes.
Also, rather than just using diced beef I added some Waitrose Ox cheek (from the meat counter). I saw it online and had never tried it so thought this was a good test. At just £7.99 per kg it’s a fair bit cheaper than the beef and stew recipes online spoke of how delicious and rich it is. First impression was how dark red the meat was, then how tough it was to cut compared to beef. I browned it off in a cast iron pan and the edges of the meat went a dark, caramelised brown. It looked great! In comparison, the beef didn’t look as impressive when it had browned. The ox cheek kept its lovely, charred edges all through the cooking too.
After browning the meat I added it to the slow cooker along with the sweated onions and garlic and the rest of the ingredients apart from the cornflour and kidney beans. I slow cooked it on low overnight and then early in the morning added the cornflour and kidney beans. I switched the temperature to high and left the lid off for a few hours to allow the Chili to thicken.
Then it was the taste test: Wow! The spice level was perfect for me. It had a comforting, warming heat while not being so spicy that it made my nose run uncontrollably and my lips burn! It was delicious. The meat was all tender and I couldn’t tell the difference between the ox cuts and beef cuts. They tasted the same to me. As the ox cheek is a cheaper cut it makes sense to use it when slow cooking as an alternative to beef. It’s also pretty lean.
Texan Chili Recipe
Serves: 6
Ingredients: Chili paste:
4 dried chili, deseeded and torn
3 Jalapeno peppers or large green chilli peppers descended and cut into chunks
1 heaped tsp chipotle paste
125ml chicken stock
The Chili:
3 cloves garlic, minced/finely sliced
1 red onion, diced
About 1kg of meat (I used 800g lean, diced braising/casserole beef and 330g Ox cheek)
500g sliced mixed peppers (frozen is fine)
1/2 tsp Ground Cinnamon
1/2 tbsp Ground Cumin
1 tsp Smoked Paprika
1 tsp Coriander paste
1 tsp Dried Oregano
15 squirts Turci BBQ spray (Or 1 Tbsp smoked BBQ sauce) *optional
Fresly ground salt and pepper
500ml chicken stock
400g tin of chopped tomatoes
1 tin kidney beans
20g cornflour
Method:
1. Fry/toast the dried chilis and jalapenos on a medium heat until the dried ones start to colour. Add 125ml chicken stock and leave to simmer until the dried chilis are rehydrated. Once cooked, add to a blender with chipolte paste and blend into a chili paste.
2. Fry the onion and garlic until soft and then add to the slow cooker.
3. Brown the Ox cheek and diced beef in batches and then add to the slow cooker.
4. Add the rest of the ingredients apart from the kidney beans and cornflour.
5. Leave to cook overnight or for at least 4 hours on low in the slow cooker.
6. Drain the kidney beans and add to the slow cooker.
7. Spoon out liquid and mix with the cornflour to form a thin paste and then pour into the slow cooker.
8. Switch to high and take the lid off. Leave to cook for a few hours for the Chili to reduce and thicken.
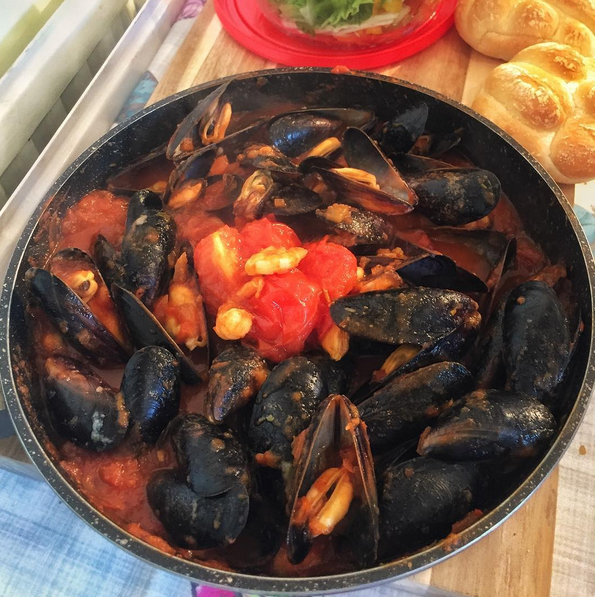
I created this recipe by adding, tweaking and tasting as I went along. I wanted a super rich, sweet tomato sauce with a decent kick of garlic to add to a mussels dish. The grated carrot gives some lovely sweetness with the dried chilis adding a subtle spice. You could add more chili if you prefer a spicier sauce.
If you blend this super smooth then you’d have a delicious tomato sauce. Keep it chunky and add some shredded fresh basil for a Spaghetti bolognaise ragu, or blend half and keep half chunky for a lovely sauce with mussels. This was so delicious.
Garlic-infused Tomato Sauce Recipe
Serves: 6
Ingredients:
100g finely diced celery
200g finely diced onion
100g grated carrot
4 cloves garlic, crushed/minced
2 tsp garlic puree
2 bay leaves
2 tsp Herbs de providence (or mixed herbs)
10 sprigs fresh Thyme, leaves removed
2 whole, dried chillis, seeds removed
1/2 tsp salt
1/2 tsp ground, black pepper
1 Tbsp capers, chopped
2 Tbsp tomato puree
1 can (400g) chopped tomatoes
250g Passata
400ml water (wash out the tomato tin)
Method:
1. Place onion, celery and garlic cloves in the slow cooker. Heat on high for 1 hour to soften.
2. Add all other ingredients and heat on low for as long as possible.
3. Remove bay leaves and blend with hand blender to desired consistency. You may want to remove half and blend half so that you have a silky smooth sauce with some chunks running through.
I didn’t take any photos of this dish while I made it as I didn’t really expect it to be exciting, however, I ended up making my own Szechaun sauce which turned out to be be really tasty and much lower in calories than the shop-bought stuff so I wanted to note the recipe so I could remember and make it again.
For Szechaun chicken I find that most ready-bought sauces lack the “stickiness” that the authentic chinese-takeaway dish has. Blue Dragon Szechuan Tomato stir fry sauce sachets seem to be the only ones that stay sticky and tasty but to serve 4 you would need 2 sachets which comes in at just under 300 calories and loaded with sugar so it’s not really a healthy option.
Although you could use normal noodles, I used Eat Water Slim noodles which are made from Konjac flour so have 9 calories per 100g. The noodles aren’t very exciting on their own, but when you turn them into a dish like singapore noodles, Thai noodle soup, ramen or szechuan noodles then they really absorb the flavors and taste REALLY good. You don’t have to use the Eat Water ones, there are Zero noodles, Barenaked noodles, etc. so just use whatever you have.
There are a few “cheat” ingredients in my recipe. Firstly I marinated my chicken in 1/4 packet of Flava-it sweet chilli marinade overnight. I’ve not used this before, but it gave the chicken a great flavor. An alternative would be no marinade or maybe some sweet chilli sauce. I also used some Lee Kum Kee Chilli Chilli Garlic Sauce which can be found in Chinese supermarkets and some Tesco stores. You could, however, make your own version of Lee Kum Kee sauce. From the ingredient list I’d say 1Tbsp would be around 1/2 Tbsp chilli paste, a pinch of salt, 1/4 tsp garlic paste and 1/4 tsp rice wine vinegar.
As a sugar substitute I used Sukrin:1. I love this granulated sweetener. It has a really lovely sweet taste without being too overpowering like other finely powdered sweeteners can be. It’s great for cooking and baking.
To make the sauce I added an initial broth to the veggies as they cooked to infuse some flavor and then drained this off with the water from the veggies as a vegetable stock. I mixed together a second sauce using a few other ingredients, cornflour (to thicken) and the vegetable stock, heated this sauce in a separate pan to thicken, and then added it back to the dish at the end when I added the noodles.
As a final note, you can just use a wok for this recipe, however, I find using an Actifry helps retain the stickiness of the sauce. So typically, I cook my chicken in an Actify, reserve it. Soften the veggies in the Wok until they’ve dropped some of their water weight and shrunk down so they will fit in my Actifry! Take the veggie water for the sauce and then add the veggies to the Actifry with the sauce and chicken. I finally add it all back into the Wok with the beansprouts, spring onions and noodles and heat through before serving. This is a fair bit of messing about, so the method below assumes that you’re just using a Wok.
Szechuan Chicken “Slim” Noodles Recipe
Serves: 5 (A week’s meal prepped lunches, or add a few extra veggies and make it to serve 4 for dinner)
Ingredients: Meat and Veg
(This can be any veggies and meat that you like, but here’s what I used…)
400g diced chicken breast marinated in 1/4 pack Flava-it Sweet Chilli Marinade
200g mushrooms, quartered
200g mixed peppers, sliced
300g small Broccoli florets,
300g julienned courgette
6 Spring onions, sliced
50g Kale
200g Bean sprouts
3 packs (600g) drained Eat water Slim Noodles (or other Konjac noodles)
Initial Broth
1/2 Tbsp Lee Kum Kee Chilli Garlic Sauce
100g passata
2 garlic cloves
20g sweet chilli sauce
1Tbsp white wine vinegar
Splash of balsamic vinegar
1. Fry the diced chicken breast and then set aside.
2. Throw all of the veggies apart from the spring onions and bean sprouts into a wok and allow to soften.
3. Meanwhile, make the broth sauce by combining in a bowl all of the broth ingredients. Stir to mix and then add to the veggies. Place the lid on the veggies to allow them to soften for around 10 mins.
4. While the veggies are softening add 10g cornflour to a bowl and use a large spoon to take some of the liquid from the veggie pan to add to the cornflour. Gradually add the water until the cornflour is smoothly mixed. Next, add all of the other ingredients to the sauce and stir to combine.
5. Once the veggies are softened you should have a fair amount of liquid in the pan. Remove as much liquid as possibe and add it to the sauce.
6. Place the sauce in a small pan with the lid on and bring to the boil stirring occasionally. You should find that it thickens into a nice, sticky sauce.
7. Add the chicken, bean sprouts, noodles, spring onions and sauce and mix to combine (Note: At this point adding mange tout, green beans, baby corns, julienned carrots or some other crunchy veggies might be nice for texture). When in the pan, I use scissors to chop up the noodles into smaller, more manageable sizes so that they mix better with the other ingredients.
8. Allow to cook for around 5-10 mins until the ingredients have absorbed the lovely sauce flavor.